In my post Simmered Kiriboshi Daikon (Dried Shredded Daikon), I used a packet of store-bought Kiriboshi Daikon. But you can make Dried Shredded Daikon at home. Home-made Kiriboshi Daikon is quite easy to make as long as you have something to dry the daikon strips on.
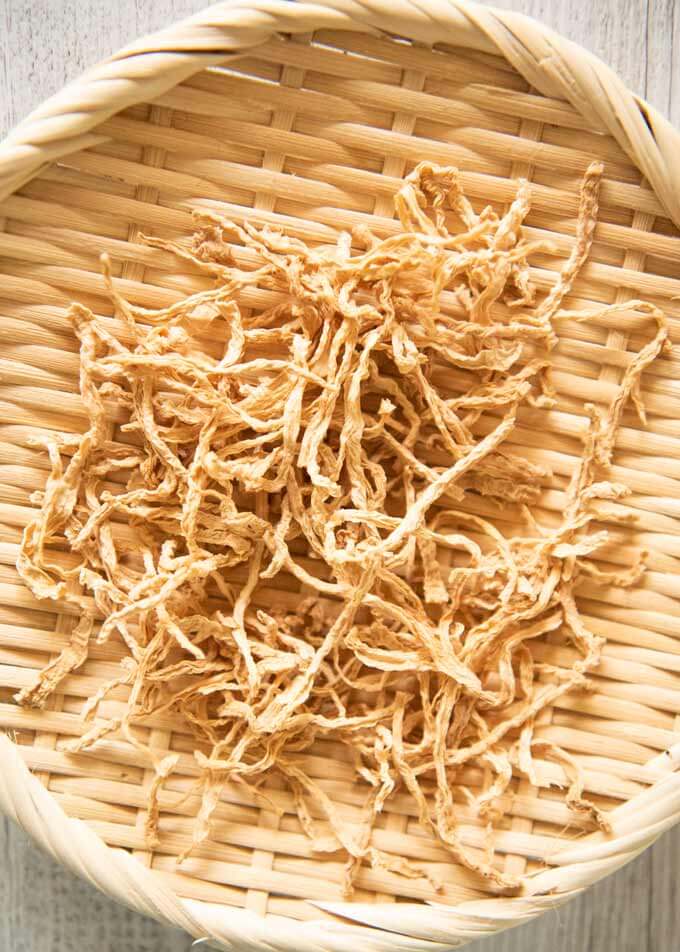
It is much easier to use store-bought kiriboshi daikon if you can buy it. But I know that some readers may have trouble finding kiriboshi daikon even at Asian grocery stores. So, I decided to show you how to make Kiriboshi Daikon at home.
The home-made version is not as brownish as the store-bought one (see the sample below) and the intensity of the dried daikon flavour is not as strong. But it is pretty close.
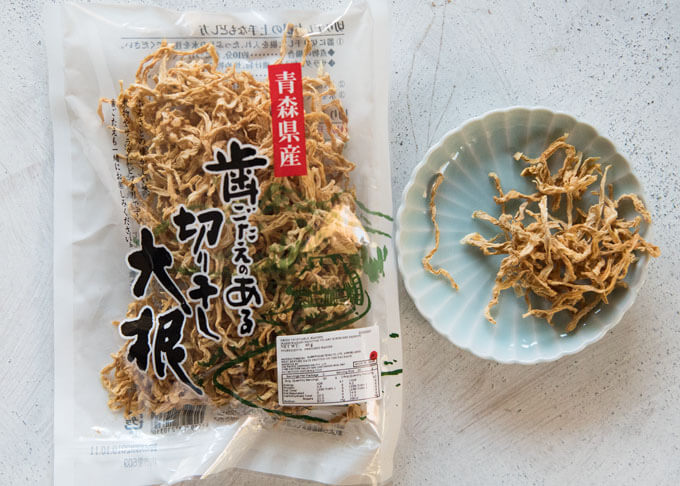
Getting Ready to make Home-made Kiriboshi Daikon
Kiriboshi Daikon is made by simply drying daikon pieces cut into matchsticks. So the ingredient is just daikon. There is no marinating or seasoning required.
The daikon needs to be cut into 5mm/3/16″ thick matchsticks. The length of the matchsticks is up to you but minimum of 5cm/2″ is ideal. I cut them into 5cm sticks because it was easier to cut them finely. Next time, I shall make them much longer, although they will need to be cut short before cooking.
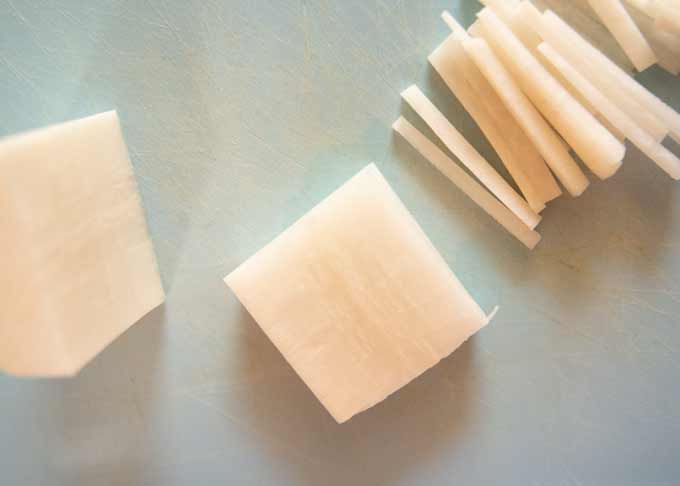
You can also cut daikon into different shapes, e.g. cut daikon into circles, then quarters. But the thickness should be about 5mm/3/16″.
Best tool to dry daikon pieces
Daikon pieces must be dried in the sun during the day.
I used a drying net that I use to make dried fish (see the photo below). It is a four-tiered net of about 50cm x 50cm x 55cm / 19 11/16″ x 19 11/16″ x 21 ⅝”. A similar drying net can be found here.
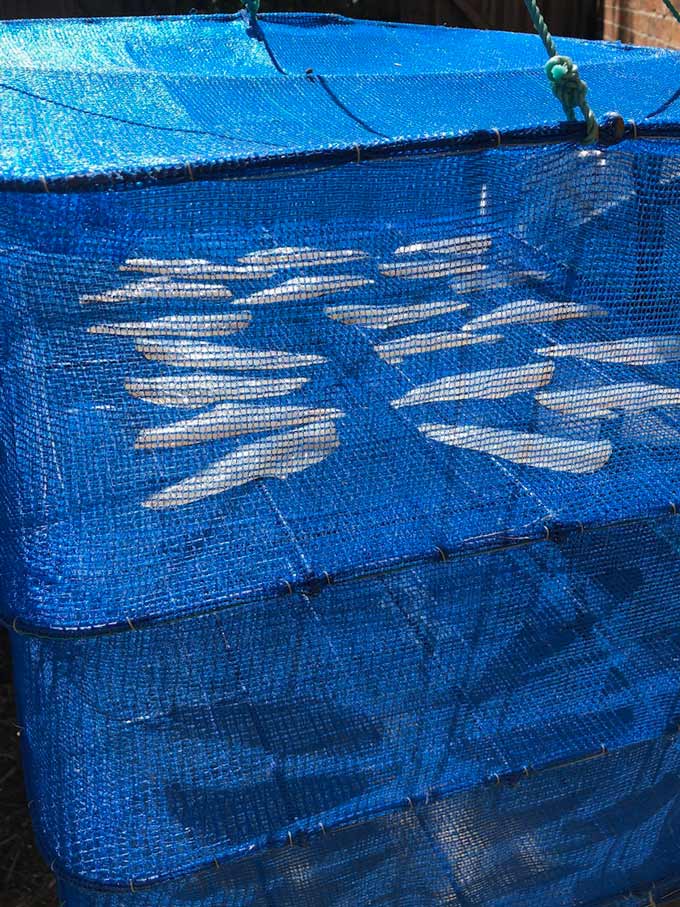
Traditionally, Japanese people use a large flat bamboo basket to dry daikon pieces because the air gets through from the bottom of the basket just like the drying net. The bamboo tray that I put my Home-made Kiriboshi Daikon in the first photo is a small version of it. A cane tray is also good.
The daikon pieces on the bamboo baskets are not covered at all. You might think that it is not very hygienic, but given that daikon season is winter there are no flies to worry about.
Even if there are flies around, they are not really interested in vegetables. Besides, you need to wash dried daikon before using. But if you are concerned, you can put a large mesh food cover over the top.
If you don’t have the items mentioned above, you could use a fly screen or spread out a large laundry washing net to put the daikon pieces on.
Drying Daikon Pieces
The daikon sticks need to be spread on the drying surface and separated individually as much as possible. For this reason, a wide area of drying surface is helpful. It is a tedious job to separate each piece because they tend to stick each other. And there are so many!
If many daikon pieces are stuck together, it slows down the drying process. But you don’t have to be super perfect in separating the daikon pieces. You will know which daikon pieces are stuck after the first day of drying them.
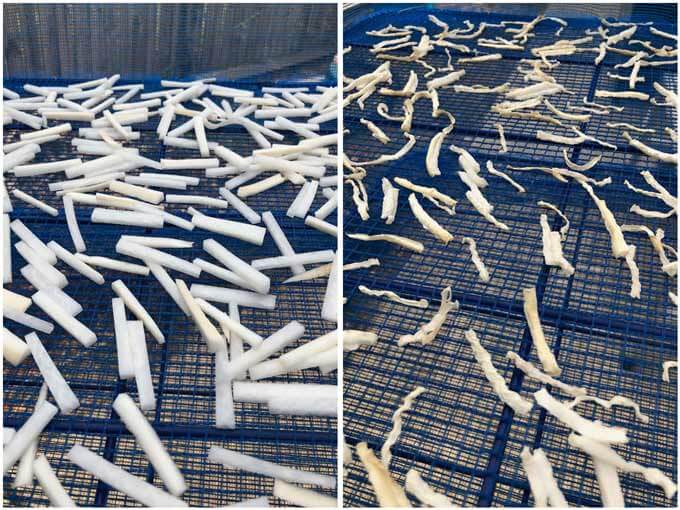
The photos above are the daikon before drying and after 1 day (9 hours to be exact) of drying them in the sun. The single daikon pieces are semi-dried already while two or more pieces stuck together still look like fresh daikon pieces. This is when you separate all these daikon pieces stuck together.
Drying Time for Home-made Kiriboshi Daikon
Daikon pieces need to be dried in the sun during the day and brought inside the house when the sun goes down. You need to repeat this every day for 5-7 days depending on how strong the sunlight is. The drying time of course varies depending on the thickness of the daikon pieces.
When I was drying the daikon pieces I had a couple of wet days and the daikon had to be kept inside all day. This extended the drying time, but in 7 days they became completely dry.
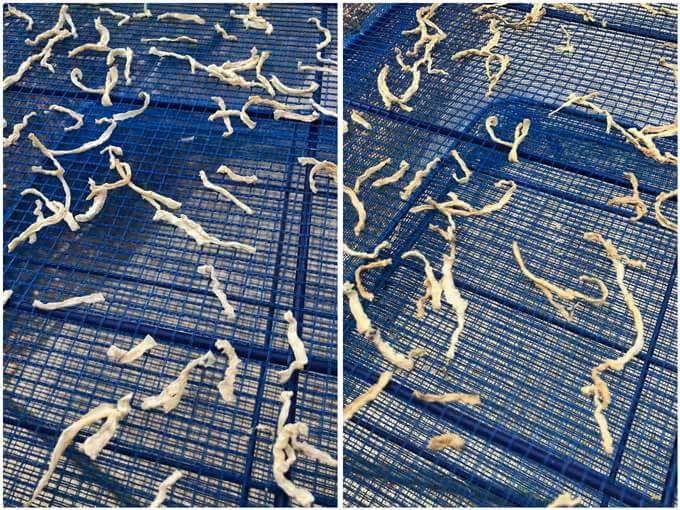
Left: after 2 days of drying. Right: After 5 days (over 7 days due to rain) and finished drying.
Even if you have a wet day or two, the final day to dry daikon pieces must be a sunny day so that you can dry them outside in the sun.
Home-made Kiriboshi Daikon (Dried Shredded Daikon) can keep for 6-12 months but I intend to use them within 6 months. Keep them in a dry place. Keeping them in fridge is good too.
Yumiko![]()
It is easiest if you can get a packet of Kiriboshi Daikon from stores, but you can make Kiriboshi Daikon at home quite easily too. All you need to make Home-made Kiriboshi Daikon (Dried Shredded Daikon) is a fresh daikon and several days of sunny weather!
Why don't you make Simmered Kiriboshi Daikon (Dried Shredded Daikon) from scratch?
- 300g/0.7lb daikon , peeled (note 1)
- A drying net, a flat bamboo basket, or a cane tray (note 2)
-
Cut daikon into about 5cm long discs (note 3). Place the daikon disc with the round surface on the cutting board and cut it into 5mm/3/16" thick rectangular slices.
-
Pile the rectangle slices on top of each other a few slices at a time, and cut them into 5mm/3/16" matchsticks in the same directions as the slices are cut.
-
Spread the daikon matchsticks over the drying surface of the net/basket, separating each piece as much as possible (note 4). A couple of daikon pieces can be stuck but there should not be many sticks piled up.
-
Place the daikon in the sun until sunset (note 5). You will notice that some daikon pieces are already semi-dried and shrunk. If they are not semi-dried, it is likely that two or more daikon pieces are stuck together. Separate them into individual pieces.
-
Bring the daikon net/basket inside the house, then take it out into the sun the next morning.
-
Repeat steps 4 and 5 for 5-7 days until the daikon pieces become yellowish (see the photo in post) and crispy (note 6). The Kiriboshi Daikon is now ready.
-
Place the dried daikon pieces in a zip lock bag and store in a dry place or fridge until required. It keeps 6-12 months.
1. It doesn’t have to be 300g/0.7lb. About 10cm/4” of my daikon happened to be 300g. It doesn’t matter how thick and long the daikon is.
If your daikon skin is very clean, you don’t even need to peel the skin. Mine was not great so I peeled it.
2. I used a drying net that I use to dry fish in. It is a four-tiered net of about 50cm x 50cm x 55cm / 19 11/16" x 19 11/16" x 21 ⅝". A similar drying net can be found here.
Alternatively, you can use a flyscreen, or a large laundry washing net.
3. If the length of your daikon isn’t close to multiple of 5cm/2”, it is not ideal, but you can make the longer matchsticks.
You can also cut the daikon into different shapes, e.g. cut the daikon into circles then quarters. But the thickness should be about 5mm/3/16".
4. You don’t need to be perfect in separating each daikon piece, but if they are stuck together the drying time will be prolonged.
5. The best place to dry the daikon pieces is in the direct sun with a gentle breeze. But no breeze is OK. Even if it's a cloudy day I put the daikon out.
If it's raining, keep the daikon inside the house.
6. It does not become very crispy to easily break. It is marginally soft but very light.
When fully dried, my Kiriboshi Daikon weighed about 30g/1.1oz, which is just right to make 2 servings as salad. Depending on how much water your daikon had, the weight of the Kiriboshi Daikon will vary slightly.
7. Rehydrate Kiriboshi Daikon when using them. For more details on how to use them in cooking, refer to the recipe Simmered Kiriboshi Daikon (Dried Shredded Daikon).
How much kiriboshi daikon do you get from drying 300g of daikon?
Hi YK, it will make about 30g of kiriboshi daikon, as indicated below the header ‘Ingredients’ in the recipe card. 30g of kiriboshi daikon will make 2 servings of Simmered Kiriboshi Daikon
I do mine in the dehydrator – works well, and quickly. Then vac seal them and keep in fridge until needed.
Hi Heidi, that’s fantastic! It must be much easier to user the dehydrator.
Thanks Yumiko-san. I love these recipes for real Japanese food, not the touristy stuff.
I have wanted to learn how to cook washoku dishes for a long time, but most Japanese cookbooks are filled with the same few recipes — not what Japanese people eat at home.
Also many thanks for the meal idea cards, as I can now put a whole meal together, rather than just a single dish. Without the proper mix of dishes, Japanese recipes doesn’t really make sense.
Many thanks, Jenny.
Hi Jenny, thank you! I am glad to know that the meal idea is also of help to you.