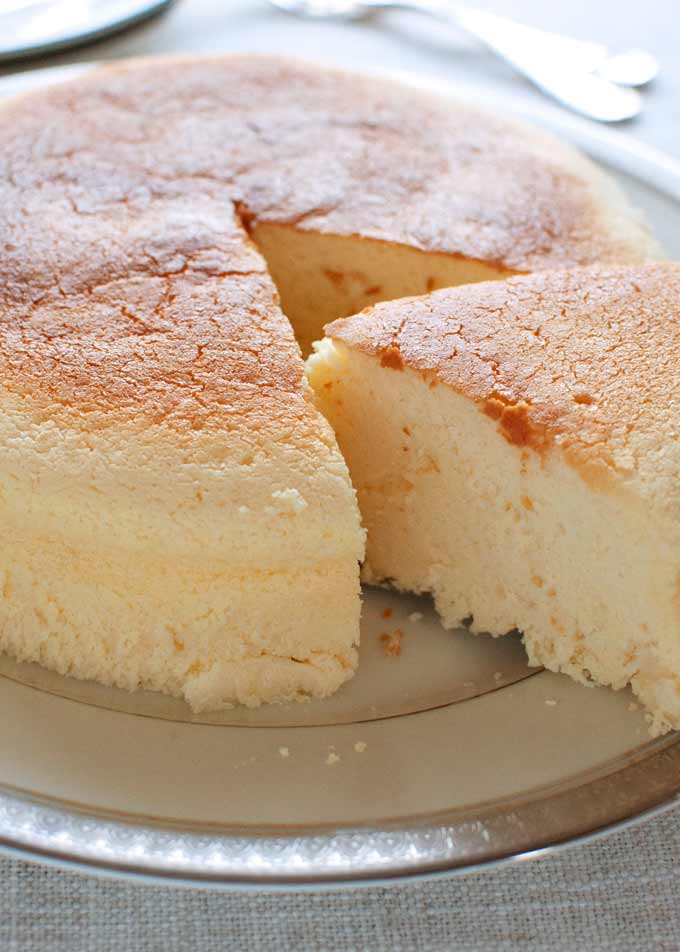
This Japanese Cheesecake is the most requested Japanese recipe on Nagi’s post ‘Request A Recipe!’. It’s light, fluffy, moist and less sweet than any other cheesecakes.
After reading hundreds of recipe requests from the readers, Nagi told me that there were quite a few recipe requests that fell under my expertise, i.e. Japanese dishes. So, I went through all the comments.
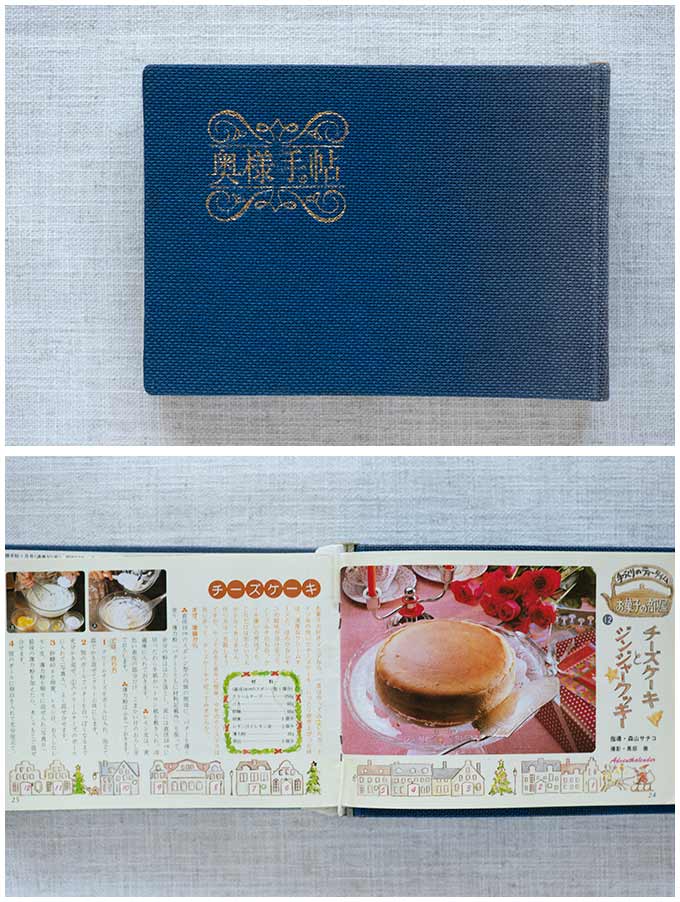
I did not know this Japanese baked cheesecake was called Cotton Cheesecake because in Japan, it is called soufflé cheesecake or baked cheesecake. This is exactly the same cheesecake that I made a long time ago using the recipe from my 40-year-old cookbook (photos below). And it says ‘baked cheesecake’.
I am aware that there is a different kind of baked cheesecake that is not as fluffy as this Japanese Cheesecake and is much richer. Nagi has posted a recipe like this – Easy Classic Baked Cheesecake.
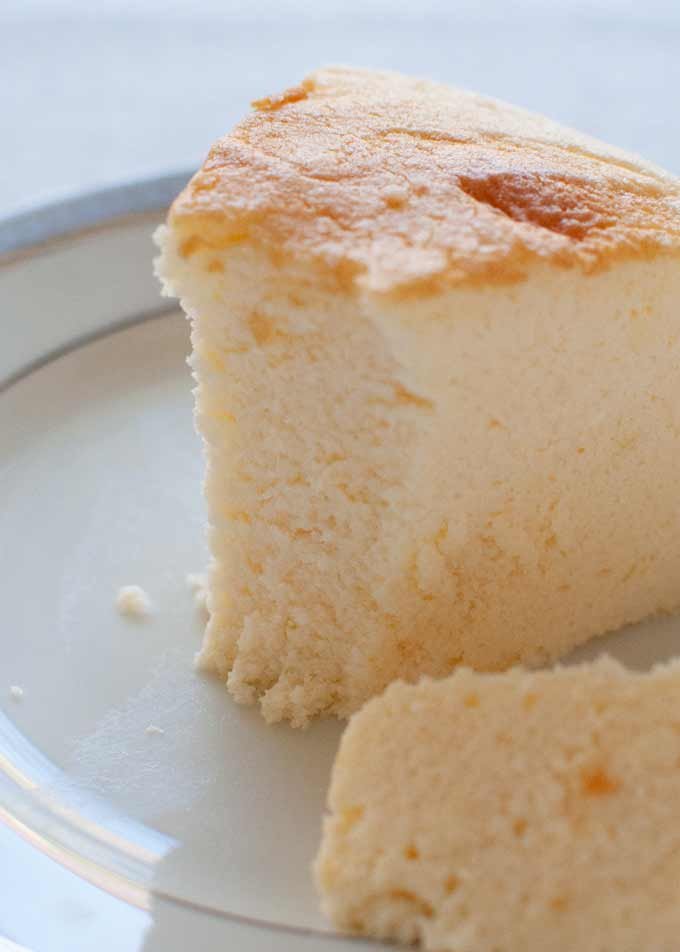
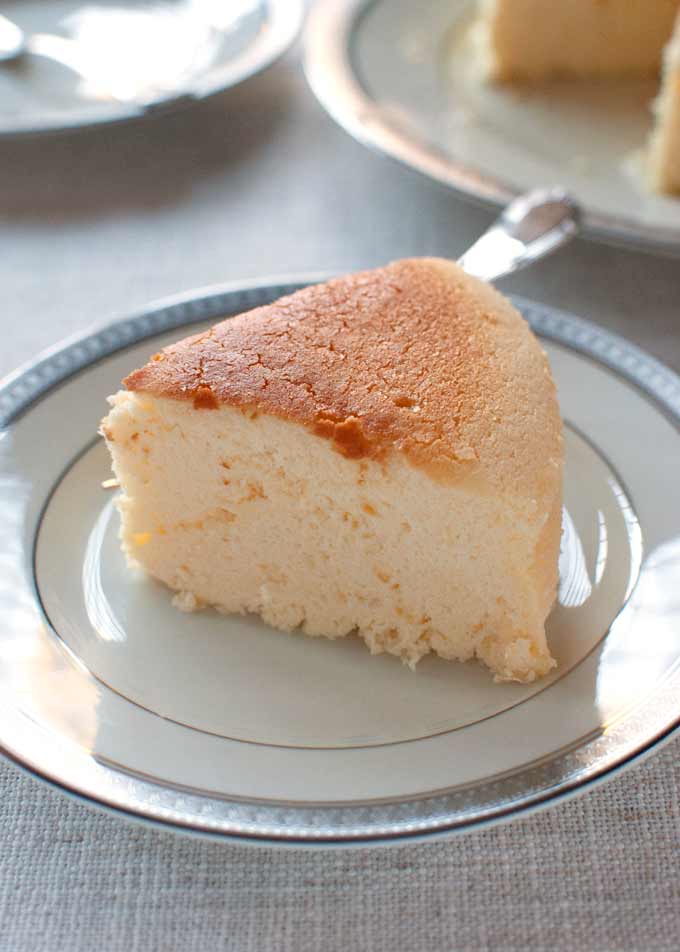
I like the fluffy texture of Japanese cheesecake. It is quite different from conventional baked cheesecake. It’s almost between a sponge cake and a cheesecake. It is very light and, to my delight, not so sweet either.
 Why So Light?
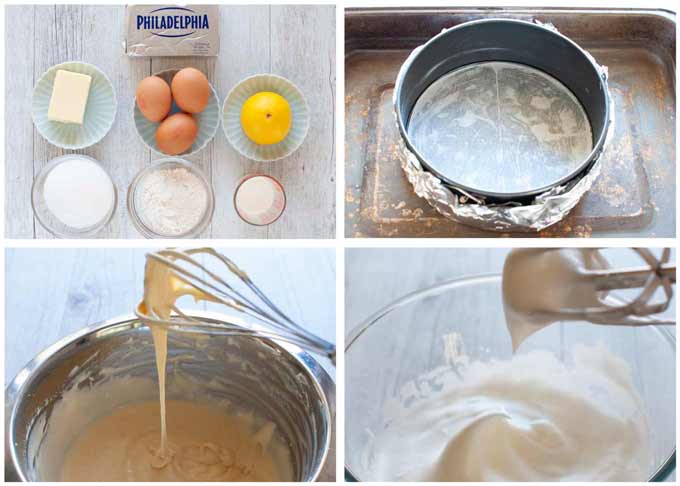
If you look at the ingredients of this cheesecake, it is obvious. To make 8 servings of a cheesecake in a 18cm round cake tin, dairy products included in this cake are:
- 250g (8.8oz) cream cheese
- 60g (2.1oz) butter
- 2 tablespoons milk
- 3 eggs
I used only 70g (2.5oz) of sugar so the cheesecake is very light in sweetness, too. My old recipe called for 60g sugar. But when I made this cake per the old recipe and asked my kids to taste test it, I was told that more sugar was required. Nagi said double the sugar (no, thanks!) and my son said OK but just a tiny bit more sugar. And I took my son’s advice.
I know that many recipes on the web use a lot of sugar to make Japanese Cheesecake. But I think that for this particular cheesecake, less sugar suits better. Everything about Japanese Cheesecake should be ‘light’.
Adding a tablespoon of lemon juice and some zest gives the cake a refreshing taste, too.
The fluffy and light texture comes from the meringue. Egg whites are beaten with some sugar to make soft peak meringue, then mixed with the batter made from the above ingredients.
My Cotton Cheesecake is perhaps not so jiggly as soufflé since I developed this recipe based on my old cookbook. But it’s still soft and tastes great.
Baking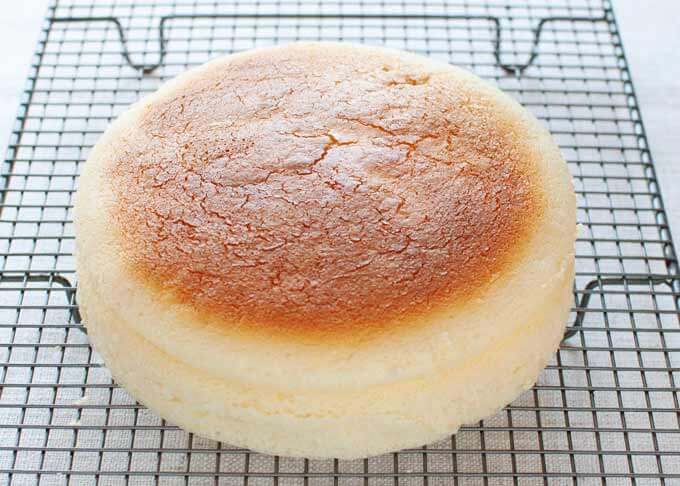
There is a bit of science applied here to make a fluffy moist cheesecake:
- The meringue needs to have a soft peak. Do not beat the meringue too much and form a hard peak. When you make a peak in the bowl by lifting the whisker, the peak should slightly bend.
- Bake at low temperature for a long time. Initially bake at 160C (320F) for 20 minutes, then at 140C (284F) for 40minutes. This prevents the surface of the cake from cracking.
- Bake in a water bath. When baking for a long time, the cake tends to dry up. The water bath keeps the cake moist.
- Lay an extra baking pan underneath the water bath. Along with the 2nd point above, this is also a tip to prevent cracking the surface.
- After turning off the oven, leave the cake in for 30 minutes, then gradually cool down with the oven door open for another 20 minutes. The inflated cake collapses badly when it is suddenly cooled down. The cake also continues to cook in the oven after turning off.
In total, it takes close to 2 hours in the oven before taking the cake out to cool down on a rack. But it’s worth it if you want to make a perfect fluffy Japanese cheesecake.
 Cracked, Shrunken Cheesecake is OK
Because each oven is different, and the volume of the cake can vary even slightly, you may still end up with a cracked cheesecake.
If you are impatient and take the cake out of the oven too early, it will shrink more than the one that is slowly cooled down. But the flavour of the cake is the same and texture is only marginally less fluffy.
As my son rightly said, don’t worry about the crack and shrink. It’s still really tasty. Below is my failed Japanese Cheesecake with cracked surface (but no shrinkage!). To come to think of it, I kind of like it with cracks.
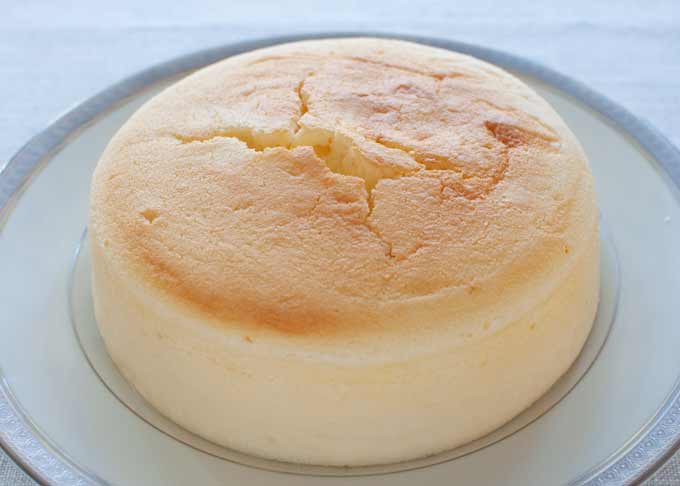
I asked my golf friends to taste test the Japanese Cheesecake that was cracked a bit. They didn’t see why I said the cake was a failure. And they all gave me the thumbs up!
It is a plain looking cake and some recipes add icing sugar or jam syrup on top. But I think that adding sweet things on top changes the characteristics of this cake. If you want to decorate the cheesecake, just sprinkle icing sugar on top to make it a bit prettier like this.

Yumiko![]()
Light, fluffy, moist and less sweet than any other cheesecakes - Japanese Cheesecake is not difficult to make. But if you want to perfect it with a smooth surface and soufflé texture, you need to do a bit extra. And it's worth the effort as it's so delicious.
Time does not include the time to cool down the cheesecake on a rack.
- 250g (8.8oz, 1⅛ cups) cream cheese softened in room temperature
- 60g (2.1oz, 4¼ tbsp) butter softened in room temperature
- 35g (1.2oz, 2⅘ tbsp) sugar
- 3 egg yolks
- 2 tbsp milk
- 1 tbsp lemon juice
- ½ lemon zest (i.e. zest of a half lemon)
- 20g (0.7oz, 2⅕ tbsp) flour (all purpose) , sifted (note 9)
- 10g (0.4oz, 1⅓ tbsp) cornflour (cornstarch) , sifted
- 3 egg whites
- 35g (1.2oz, 2⅘ tbsp) sugar
- 18cm (7") cake pan (note 1)
- A baking tray or a large non loose-base cake pan to comfortably fit in the cake pan , for water bath
- An oven tray or a baking tray to place a water bath tray on
- Hot water , about 80C (176F)
-
Pre-heat the oven to 160C (320F). (note 2)
-
Grease the bottom and the side of the cake pan with butter (not in ingredients) and line the bottom with baking paper (note 3).
-
If the cake pan has a loose bottom, cover the bottom and side of the cake pan with large aluminium foil (or a disposable round aluminium tray) so that the foil continuously covers the bottom and the side to just below the rim.
-
Add cream cheese in a bowl and whisk over water bath (not too hot) to soften the cream cheese. Add butter and whisk until the mixture becomes creamy with no lumps.
-
Remove the bowl from the water bath and add the remaining Batter ingredients one by one in the order of the ingredients list. Mix every time an ingredient is added. Mix well until the colour of the batter becomes consistent.
-
In a new bowl, add egg whites and beat until they become foamy.
-
Add sugar in 3-4 batches while beating the egg whites fast. Beat until soft peaks form (note 4).
-
Add a third of the meringue to the batter and fold gently using a spatula until white meringue mixes into the batter.
-
Now transfer the batter to the meringue bowl and fold gently until the trace of the white meringue disappears.
-
Pour the batter into the cake pan. Drop the pan from 10cm (4") high few times to remove air bubbles.
-
Place the cake pan in a deep baking tray or a large non loose-base cake tin. Fill hot water to 1.5cm (⅝") high (water bath).
-
Place an oven tray/baking tray on the middle rack of the oven, place the water bath tray with the cake pan inside and bake for 20 minutes.
-
Reduce the heat to 140C (284F) and bake further 40 minutes.
-
Turn off the oven and leave the cake in the oven for 30 minutes (note 5).
-
Insert a thin bamboo stick in the middle of the cake. If it comes out dry, the cake is cooked. If still slightly wet, turn the oven on to 160C (320F) and cook for 5-10 minutes.
-
Remove the cake from the water bath and gradually cool the cake down for further 20 minutes in the oven by slightly leaving the oven door by sticking the oven mitt or a cloth to the door (note 6).
-
Remove the cake from the cake tin and place the cake on a rack to cool down to room temperature.
-
Better to be served after chilling it in the fridge. (note 7)
1. It will make a cheese cake about 4.5cm (1¾”) high. If you are using a 20cm or 23 cm (8" or 9") cake pan, you may want to increase the ingredients by a quarter or a third to maintain the height of the cake (a third is easier considering the eggs). The first cooking time at 160C (320F) needs to be increased to 30 minutes but the rest of the instructions remains the same.
2. Temperature is critical. Make sure that the inside of the oven is the right temperature as some ovens have discrepancies between the actual inside temperature and what the setting indicates.
Also, I used a fan forced oven. A standard oven needs to be a bit higher but do not go too high. It is better to have a lower than required temperature than higher.
3. I don't line the side of the tin because it will leave creased mark on the side of the cake. But if you are not concerned about it, line the side of the cake tin and grease with butter.
4. Soft peaks: When you lift the whisker, the meringue forms a peak but then slowly folds. Do not beat too much or you will get a hard peak – the meringue peak does not fold and is stiff.
5. This is to prevent the inflated cake from collapsing. It also continues to cook the cake.
6. This step can be skipped if you are in a hurry, though the cheesecake might shrink a little bit.
7. Japanese Cheesecake looks attractive as it is with no decorations but if you insist, you could sprinkle icing sugar over it. The icing sugar will dissolve as time goes by so decorate just before serving.
I am not a fan of topping the cake with jam syrup or icing sugar as I believe it defeats the whole idea of lightly sweetened cake. But if you have a sweet tooth, why not?
8. Because each oven is different and the volume of the cake can vary even slightly, you may find that the surface of the baked cake is not as brown as my cake. If you wish to make it browner, you can turn the upper heat on for a short while. But don't over bake.
9. I am adding a new note here for coeliac bakers. A reader reported to me that she used gluten free baking flour (equal weight) and it worked perfectly.
Hello, after reading this awesome article i am as well delighted to share my familiarity here with mates.
Hi Everette, thank you!
Good post. I’m experiencing a few of these issues as well..
Hi Elizabeth, I know it is a bit tricky. Tiny differences in temperature, firmness of beaten egg white, etc makes it different. If temperature is too high at the beginning, it inflates too fast, causing a crack and deflates more severely too. When I find time, I would like to try and come up with a fail-free recipe.
what is the best oven to use , Pizza one or convection one , so can you recommend the best type giving the best baking results
Hi there, convection one is good.
I made this the other day and followed your recipe to exact direction – turned out beautiful…
Shrunk only a tad, didn’t crack but very light and fluffy. BF loved it!
Definitely worth having a go, taking your time and in the end – you get a lovely silky cake that is not heavy, not dense but so more’ish… Will be making this one again for sure – thank you!
PS; I love getting your emails – you inspire me all the time 🙂
Hi Ange, that’s wondefgul and well done! I agree that it is in deed worth having a go.
This looks wonderful but I have celiac disease. Do you think another flour could be used?
Hi Cyndi, I have not tried but you could replace flour with cornflower/corn starch.
Hi. If I wanted to make half smaller from ur recipe, is that the duration to bake same?
Hi Jing, I haven’t tried a small size but I think that the duration needs to be reduced. By how much is a good question. I would think that the first stage can be 15 minutes, the second stage at lower temperature can be 20 min. I am sorry that it is a guess work.
Hi Yumiko just wondering if this would work as cupcakes in a silicone cupcake pan or better in a tin cupcake pan. If they work as cupcakes, how much batter do I put in without the cake rising too much it overflows and how long do I bake them in the oven.
Thanks I’m advance!
Hi Samantha, I haven’t tried a cup cake version. I am sorry.
But looking at some Japanese recipes, most recipes use either tin cup cake pan or ceramic cups. They fill batter to about 80% and cook at 170C for 30 minuets. I shall try it one day.
Hi Yumiko I ended up trying the cupcakes and guessing the time but it want a success. They were dense and flat but tasted great.
Tried the recipe again last night as a cake but followed your instructions except I whisked the cream cheese and butter in a small saucepan on low heat until smooth.
Also I tested the round cake pans I have with all removable bottoms and found the water got inside so I used an 8″ 1 piece square tin and increased the batter by an extra 3rd.
It did rise but then deflated and overall didn’t rise much higher than the original batter height so it’s a bit flat maybe around 4cm high.
I’ve left it in the fridge overnight for a party today. Colour looks great compared to the cupcakes however it feels a bit dense but I guess I’ll see how it goes tonight 🙂
I’ll report back soon
Hi Samantha,
A square tin does not work well unfortunately as the heat does not penetrate evenly due to the shape.
Did you place a couple of layers of aluminium foil underneath the round cake tin with a removable bottom and covered it to the level where the water does not come inside? I cooked a cake in the tin with a removable bottom and it did not have water problem.
Dense cake and lack of rise go together. Dense cake could be due to (1) too much whipping to make meringue so that bubbles of meringue becomes too small, (2) over-mixing meringue with the batter – it’s OK even if the mixture is slightly marbled with white meringue, (3) oven temperature is too low – make sure that the temperature dial of the oven is accurate – you may want to check the inside temperature with an oven thermometer.
Good luck with the cake next time.
Your persistence made me want to try this in cup cakes. When I succeed, I shall update the recipe!
Hi Yumiko,
I’m keen to give this recipe a try this weekend! Just wondering if it’s ok to leave Cornflour out of the mixture and use 30g of Flour instead? Have you experimented this before? Thanks for your time!
Jen
Hi Jennifer, I have not substituted cornflour with flour. The cake might be a bit heavy as cornflour makes the sponge lighter but I think you can use flour.
Do you want to avoid corn flour because you can’t consume corn? If so, you can use potato starch as a substitute.
Hi Yumiko!
First of all, thank you so much for this wonderful cheesecake recipe.
I’ve been trying all kinds of recipes but this is the best so far!
My cake doesn’t shrink much and it is so soft and tastes so good!
By the way, I would love to bake a bigger size of it, may I double the ingredients?
If I double the ingredients, which size of pan would you recommend?
The baking time should i follow your Recipes Note No. 1?
Look forward to your reply! <3
Hi Marilyn, Jannelli asked me the same question and I responded to her. Do you mind reading my reply which should be the latest comment listed below the recipe.
Sure, Thank you very much!
Oops, I forgot to say Thank You for a positive feedback!
If i double the ingredients, would the cake still be good?
Hi Jannelli, I have never seen Cotton Cheesecake made in a cake pan larger than 23cm/9″ and that would be too small to take doubled amount of the ingredients.
I have never tried a cheesecake larger than 23cm/9″, either. It might not be physically possible to make fluffy and tall cheesecake with a large pan. If the quantity is 50% more, it could work with 23cm/9″ cake pan but if you would like to make twice as much, then I would suggest that you make two cakes.