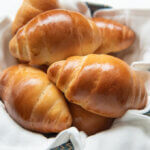
Japanese Butter Rolls are soft, fluffy bread rolls with a delicate buttery flavour and a hint of sweetness. Their light, tender texture and simple flavour make them one of the most popular everyday breads in Japan.
See the video.
The entire process takes more than 3 hours. But, you can split the process into 2 phases and make the bread over 2 days. Please see the instructions under the heading Making Japanese Butter Rolls in 2 Phases.
- 200g/1⅙ cup bread flour (also called strong flour)
- 25g/1⅔ tbsp sugar
- 4.5g/¾ tsp salt
- 30g/2 tbsp egg beaten (note 1)
- 3.5g/0.25oz dry yeast (tiny bit less than 1 tsp, note 2)
- 80ml/5⅓ tbsp water warmed to body temperature (note 3)
- 35g/2½ tbsp unsalted butter cut into small cubes, softened
- Beaten egg (note 1)
-
Put the flour in a large bowl, then add sugar, salt, and egg around the edge of the flour.
-
Create a dent in the flour away from the salt and put the yeast into it. Do not scatter the yeast. Then add the warmed water, aiming at the yeast.
-
Mix the ingredients well using a spatula until the mixture becomes sticky with no dry flour left at the bottom of the bowl.
-
Transfer the dough onto workbench. Use hands to knead the dough until it becomes very sticky and there are no white patches of flour.
-
Flatten the dough and shape it into a rectangle about the size of your hand. Place the butter on the dough, then fold the dough over to cover the butter. Punch the dough to flatten the butter inside.
-
Using both hands, knead the dough for about 10 minutes (note 4), until the surface of the dough becomes smooth. Initially, the butter will ooze out and the dough will stick to your hands, but as you continue kneading, it will become less sticky and eventually stop sticking to your hands.
-
Lift the end of the dough, slap the dough on the workbench, then fold it int half. Repeat, rotating the dough 90 degrees, for about 10 minutes until the dough develops sufficient level of elasticity (note 5).
-
Shape the dough into a ball by tucking the outer edges underneath, ensuring that the surface of the ball is smooth. Place the dough in the bowl (note 6), with the smooth side up.
-
Cover the bowl with a wet cloth, then with cling wrap. Leave it in a warm place at 35°C/95°F for 60 minutes, or until the dough doubles in volume.
-
Dust your index finger with the bread flour and insert it in the middle of the dough to make a hole, then remove your finger. If the hole stays open without closing up, it is ready. If it closes, you will need to let the dough rise longer.
-
If the dough is likely to stick to your workbench, dust the surface with a small amount of bread flour.
-
Using a dough scraper (or a spatula), partially detach the dough from the side of the bowl. Then hold the bowl upside down and let the dough naturally drop onto the workbench.
-
Using the scraper (or a knife), divide the dough into 8 equal portions (note 7).
-
Taking one portion at a time, stretch the dough, turn it over so that the smooth side is facing up (note 8). Fold the edges down towards the centre to form a ball. Pinch the edges together at the bottom to form a round pouch (upside down).
-
Place the dough on the workbench, with the pinched side facing down.
-
Cup your hand loosely over the dough, then move your hand in a circular motion for about 8-10 rounds. The dough should form a smooth round ball.
-
Repeat with the remaining dough portions.
-
Cover the 8 balls on the workbench with a wet cloth and let them rest for 20 minutes (bench rest/bench time).
-
Remove the cloth.
-
Line a baking tray with baking paper.
-
Taking one ball-shaped dough at a time, flatten it with your palm to remove the air, making a flat round shape about 6cm/2⅜" in diameter. Flip the flat dough over so that the smooth surface is facing down.
-
Fold the edge of the dough furthest from you over so that the edge will be in the middle of the circle. Press the edge down to secure the fold. Repeat with the edge closest to you. You should have a flat log shape.
-
Fold the dough over so that the straight edge furthest from you meets the straight edge closest to you, forming a baton shape. Press along the seam with your index finger and thumb to secure the shape.
-
Position the dough horizontally on the workbench. Place the palms of both hands on the dough and roll it by moving your hands back and forth while gradually moving them outwards. The dough should start to stretch.
-
Apply slight pressure on the little-finger side of your dominant hand while moving your hands to form a spear shape at one end of the dough.
-
When the spear-shaped dough becomes 13-15cm/5-6" long, position it vertically, with the pointed end closest to you.
-
Place a rolling pin in the middle of the dough with your dominant hand and hold the pointed end of the dough with your other hand. Slowly roll the pin towards you while gently pulling the dough towards you. The dough should be stretched to about 10-12cm/4-4¾" long with the end closest to you becoming narrower.
-
Return the rolling pin to where you started, using your dominant hand, and hold the furthest end of the dough with your other hand. Roll the pin away from you while gently pulling the dough away from you. The dough will widen slightly as you roll it. The flattened dough should become a spear shape about 25cm/10" long, with a narrow end closest to you.
-
Fold about 5mm/3⁄16" of the dough at the widest end (farthest from you) to make the core of the roll. Starting from the folded end, gently roll the dough towards the narrow end (note 9).
-
Place the rolled dough on the baking tray lined with baking paper, with the end of the roll facing down.
-
Repeat with the remaining dough.
-
If you have a mist sprayer, lightly spray the dough on the tray with water.
-
Leave the rolls in a warm place at 35°C/95°F for 60 minutes (proofing), until they rise to about twice their original volume.
-
Pre-heat the oven to 190°C/374°F (note 10).
-
Baste the upper surface of each roll with the beaten egg. Try to apply the egg thinly making sure to brush the indentations between the layers of the dough as well (note 11).
-
Place the tray on the middle shelf of the oven and bake for 12 minutes.
-
Remove the tray from the oven and transfer the rolls to a cooling rack to cool.
-
Complete the process to the end of instructions under the heading Shaping Dough above. But instead of placing the rolls on a baking tray, place them in an airtight container lined with baking paper (note 12).
-
Put the lid on tightly and store the rolls in the fridge for 8-12 hours or in the freezer for up to 1 month.
-
Cover the remaining beaten egg for basting and keep it in the fridge.
-
If you stored the rolls in the fridge, transfer them together with the baking paper to a baking tray. If you stored the rolls in the freezer, take the container out and leave it on the workbench for about 1 hour to thaw, then transfer the rolls to a baking tray.
-
Leave the rolls in a warm place at 35°C/95°F for 60-70 minutes to proof, until they rise to about twice their original volume.
-
Follow the instructions above from Baking onwards.
1. One beaten egg will leave more than enough egg for the egg wash. Put the basting egg through a sieve to remove any lumps of egg whites.
2. I used Tandaco brand dry yeast which is active dry yeast and comes in a 7g/0.25oz sachet. Lowan Dried Instant Yeast is another dry yeast that can be used in this recipe.
In Noth America, I think Fleischmann’s Active Dry Yeast is the equivalent product.
3. You can microwave the water for about 5-7 seconds to warm it up.
4. The time required depends on how hard you knead and slap the dough. You can also use a stand mixer or a hand mixer with kneading attachments.
5. Elasticity check: Hold the dough with both hands and stretch it by gently moving your hands outwards until a very thin film of dough forms. If the film does not break when you gently push your fingers against it from the other side, the dough is ready.
6. You can use the mixing bowl you used earlier. I quickly rinse the inside to remove any bits of flour, which makes it easier to remove the risen dough later, but it is not essential.
7. I weighed the total dough first (weigh the bowl with the dough in it, then weigh the empty bowl after removing the dough, and calculate the difference), then divide the total weight by 8. Each portion should be around 45g/1.6oz.
It doesn’t have to be exactly one-eighth if you don’t have a scale.
8. If you accurately weighed each portion of dough, you are likely to have small bits added to some portions. Try to fold these bits into the dough so that the surface of the pouch is smooth.
9. It is important not to roll the dough too tightly. You can simply push the rolled dough with your fingers to move it along as you roll.
10. If you are using the same oven for rising the dough and baking, you may finish basting before the oven reaches to the pre-heating temperature. It's OK to leave the basted rolls on the workbench until the oven is ready to bake.
11. If the egg wash is applied too thickly, the surface of the bread becomes too brown and crusty when baked.
Make sure you coat the top thoroughly. Any missing patches will show clearly after baking because the egg-washed area will become brown while the missed patches will remain whitish.
Be careful not to damage the soft texture of the roll when using a brush. Hold the brush flat against the surface and brush gently.
12. If your container is as large as the baking tray, you can line the container with baking paper cut to the size of the tray. My container was smaller, so I cut the baking paper for the tray into 8 pieces by halving it lengthwise, then cutting each half into quarters. Place the 8 pieces in the plastic container, slightly overlapping them so that they fit.