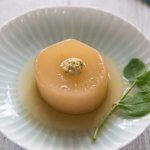
Daikon is the hero of this Simmered Daikon recipe because it is just a daikon cooked in soy-based broth. This is one of the simplest looking dishes, yet it is so tasty with a knob of wasabi as a garnish.
Cook Time is long as you need to do pre-boiling for 15-20 minutes. But you can stop at this point and re-start cooking the next day if you want.
Use konbu dashi to make this dish vergetarian.
- 500g/1.1lb daikon cut to 3-4cm/1⅛-1½" thick discs (note 1)
- 2 tbsp rice or white liquid from washing rice
- 500ml/1.1pt dashi stock (note 2)
- 1 tbsp light soy sauce
- 1 tsp mirin
- ½ tsp salt
- Wasabi paste
-
Peel skin of each daikon disc thinly, then remove the round edges (mentori) of each disc. See the section MENTORI (面取り) for details.
-
(Optional) If your daikon discs are thick and large, make cross incisions on one side of each daikon. The depth of incisions needs to be ⅓ to ½ through. See the photo in the section KAKUSHIBŌCHŌ (隠し包丁). This will cook daikon pieces faster.
-
Place daikon pieces in a pot (note 3) without overlapping, flat side up.
-
Add water with 2 tablesponns of rice or white liquid to cover the daikon pieces about 1-2cm/¼” above the daikon.
-
Bring it to a boil. Reduce to low and cook for 15-20 minutes until the centre of daikon pieces are cooked through (I use a bamboo skewer to poke daikon in the centre to check it).
-
Remove from heat and leave to cool a bit. Rinse daikon pieces and remove stickiness from the surface of daikon (note 4).
-
Place daikon pieces in a pot, flat side up without overlapping. Add the Fukumeni Flavouring ingredients.
-
Bring to a boil. Reduce heat to medium, place a drop lid (note 5) on and cook for 20 minutes.
-
Transfer the daikon to a zip lock bag without overlapping, then add the liquid in the pot to the bag (note 6).
-
Remove the air as much as possible from the bag (note 7), seal the bag and leave it to cool. Best to leave overnight.
-
Serve (cut side down if you made incisions in step 2) with some broth and a drop of wasabi in the centre.
1. Diameter of my daikon discs were between 5cm/2” and 6cm/2"⅜”.
If your daikon is very large, you can cut each disc in half to make it a semi-circular shape.
2. Use konbu dashi if you are a vegetarian. See Varieties of Dashi Stock.
3. Since the recipe calls for just the right amount of broth to cook daikon, it is preferable to use a pot that can just fit in all the daikon with few spaces left over. This will allow the broth to fully cover the daikon pieces.
If you only have a large pot, I would suggest one of the following:
• Increase the quantity of broth; or
• Add baking beads or small mug cups etc. to fill the gap so that the level of the broth lifts up to cover the daikon.
4. At this stage, you can leave the daikon in the fridge and cook 1-3 days later, or in the freezer for a month.
5. Drop lid is called ‘otoshi buta’ (落し蓋) in Japanese. It is a round lid that is slightly smaller than the opening of a pot. It is traditionally made of wood but I have a stainless lid as well.
It is placed on top of the ingredients in a pot to ensure the heat is evenly distributed, cooks faster, and makes the ingredients stay in place without breaking apart. It also stops the liquid from evaporating quickly.
If you don’t have a drop lid, you can make one with aluminium foil or baking paper. Cut a square foil/paper, fold/cut the edges to make it a round shape with the diameter slightly smaller than the pot. Then poke the foil/paper with a knife or a chopstick to make holes in several places.
6. Instead of using a zip lock bag, you can use a container/jar that all the daikon pieces can snuggly fit in.
7. I don’t have a vacuum food sealer so I do the following to remove most of the air from the bag:
• Place daikon discs without overlapping in a bag, then add the broth.
• Close the zip all the way but leave a small opening at the end.
• Fill water in a kitchen sink or a large deep bowl and gently lower the zip lock bag into the water. As you lower the bag, massage the bag to let the air bubbles stuck inside the bag out.
• When the water level reaches the zip line and the bag is mostly vacuumed, seal the zip.
8. Simmered Daikon keeps several days in the fridge. If you did not freeze the daikon after pre-boiling them, you can freeze Simmered Daikon in broth for about 1 month.
9. Nutrition per piece. Sodium is high as it assumes you drink all the broth which is probably not the case.
serving: 203g calories: 54kcal fat: 0.9g (1%) saturated fat: 0.2g (1%) trans fat: 0g polyunsaturated fat: 0.2g monounsaturated fat: 0.3g cholesterol: 0.9mg (0%) sodium: 617mg (26%) potassium: 381mg (11%) carbohydrates: 8.4g (3%) dietary fibre: 1.7g (7%) sugar: 3g protein: 3.3g vitamin a: 0.1% vitamin c: 37% calcium: 2.5% iron: 3.7%